HTML is a markup language For web pages. In fact, HTML stands for HyperText Markup Language.
One thing that needs to be made clear right away and kept in mind is that theHTML is not a programming language: HTML is only for format text and to layout elements such as forms, quotes, videos.
In this brief guide we will not dwell too much on technical or philosophical discussions of what is a hypertext, but we will take as our definition that of a web page, a navigable page on the Internet.
Tools
All you need to develop your first html page is a simple text editor, for Windows users the simple Notepad.
Our first HTML page
We open notepad and enter the following code:
<html></html>
We click save and choose a name "page.html" and from the drop-down menu "save as" let us remember to select "all files“.
At this point we have created our first html page, which when opened will show a blank page.
Each html page basically consists of two elements, a head <head> and a body <body>.
We modify our page in this way:
<html>
<head></head>
<body></body>
</html>
The DOCTYPE
At this point it is important to introduce the concept of DOCTYPE. The doctype is a declaration that is inserted at the beginning of the document that allows browsers to render the page correctly. In the case of HTML5 the doctype declaration is as follows:
<!doctype html>
<html>
<head></head>
<body></body>
</html>
In the past, longer and more articulate doctype statements were used, but now theHTML5 is a standard, so we will limit ourselves only to this one.
Adding a title to the HTML page: the title tag
If we try to open the previously created html page, we will see that the window bar will show the file path. If we want to add a more explanatory title, we can add the tag </strong> in the<strong><head></strong> Of the document.</p>
<pre class="wp-block-code" data-no-auto-translation=""><code class="language-markup line-numbers"><!doctype html>
<html>
<head>
<title>My first web page</title>
</head>
<body></body>
</html></code></pre>
<p>In addition to making the page more user-friendly, the presence of the title is also important on the side <strong>SEO</strong>.</p>
<h2 class="wp-block-heading" id="i-tag">Tags</h2>
<p>One of the first things we can notice is that HTML is a language composed of tags. Each HTML tag is always enclosed between a minor sign ( ). A generic tag is characterized by the following syntax: </p>
<pre class="wp-block-code" data-no-auto-translation=""><code class="language-markup line-numbers"><nomedeltag></code></pre>
<p>Tags can provide an opening <strong><nometag></strong> and a closing <strong></nometag></strong>, </p>
<pre class="wp-block-code" data-no-auto-translation=""><code class="language-markup"><h1>Article Title</h1></code></pre>
<p>or be tags that contain no elements so they are self-closing. An example of the latter type of tag is. <strong><img /></strong>.</p>
<pre class="wp-block-code" data-no-auto-translation=""><code class="language-markup line-numbers"><img src="mondo.jpg" /></code></pre>
<p>In this brief guide we will not analyze all html tags, but only the most frequently used ones. For an exhaustive list of all tags you can look at <a href="https://developer.mozilla.org/en-US/docs/Web/HTML/Element">here</a>.</p>
<p>Let's see what the main tags are and how to use them.</p>
<h2 class="wp-block-heading" id="il-tag-h1-e-gli-altri-headings">The tag <h1> and the other headings</h2>
<p>The tag <strong><h1></strong> is used to define a heading (title, header), which is text that has greater importance within the content of our html page, so it will be formatted with a larger font. </p>
<p>There are various header tags based on importance: therefore, you can have <strong><h1></strong>, <strong><h2></strong> , <<strong>h3></strong> , <strong><h4></strong> , <strong><h5></strong> , <strong><h6></strong>. </p>
<pre class="wp-block-code" data-no-auto-translation=""><code class="language-markup"><h1>Page title</h1></code></pre>
<h2 class="wp-block-heading" id="il-tag-p">The tag <p></h2>
<p>The <<strong>p></strong> is used to define a paragraph. By inserting text within this tag, it will be formatted as free text. </p>
<pre class="wp-block-code" data-no-auto-translation=""><code class="language-markup"><p>On this page we will discuss HTML.</p></code></pre>
<h2 class="wp-block-heading" id="il-tag-b">The tag <b></h2>
<p>The tag <strong><b></strong> Is used to highlight text:</p>
<pre class="wp-block-code" data-no-auto-translation=""><code class="language-markup"><b>very important text</b></code></pre>
<p>Its operation is identical to that of the tag <strong>, bold a portion of text.</p>
<h2 class="wp-block-heading" id="il-tag-a">The tag <a> </h2>
<p>The tag <a> is used to define a link (links between web pages) allows us to create a link from our page to another page. The syntax of a link is as follows: </p>
<pre class="wp-block-code" data-no-auto-translation=""><code class="language-markup"><a href="https://www.google.it">Link to Google</a></code></pre>
<p>We can see that the tag <a> needs the href attribute indicating the destination page. </p>
<h2 class="wp-block-heading" id="il-tag-img">The tag <img></h2>
<p>The tag <strong><img></strong> is used to insert an image within the HTML page. Unlike the previous tags, the <img> is a self-closing tag, that is, it does not need a closing tag.</p>
<pre class="wp-block-code" data-no-auto-translation=""><code class="language-markup"><img src="immagini/terra.jpg" /></code></pre>
<p>As we see in the example, the tag <img> needs the src attribute, which indicates the path to the image to be displayed. The tag <img> Can also have other attributes:</p>
<pre class="wp-block-code" data-no-auto-translation=""><code class="language-markup"><img src="immagini/terra.jpg" alt="image of the Earth" /></code></pre>
<p>In this example, the alt attribute is used to display alternative text in case the image does not load. It is also useful for indicating to search engines what is displayed on the page, which is very important from an SEO perspective.</p>
<h2 class="wp-block-heading" id="i-tag-lista-ul-ol-li">The list tags <ul>, <ol>, <li>.</h2>
<p>If we want to show a list in our html page we can use the <ul> tag. This tag shows an unordered list, so a dot will appear at the side of each list item. In case we want to show a numbered list we can use the <ol> tag. </p>
<p>Each list item must be enclosed within the <li> tag.</p>
<pre class="wp-block-code" data-no-auto-translation=""><code class="language-markup"><ul>
<li>Primo punto</li>
<li>Secondo punto</li>
<li>Terzo punto</li>
</ul></code></pre>
<h2 class="wp-block-heading" id="mini-tutorial-come-creare-la-tua-prima-pagina-web">Mini tutorial: how to create your first web page</h2>
<p>After taking a quick look at the main html tags, we can try to create our first web page.</p>
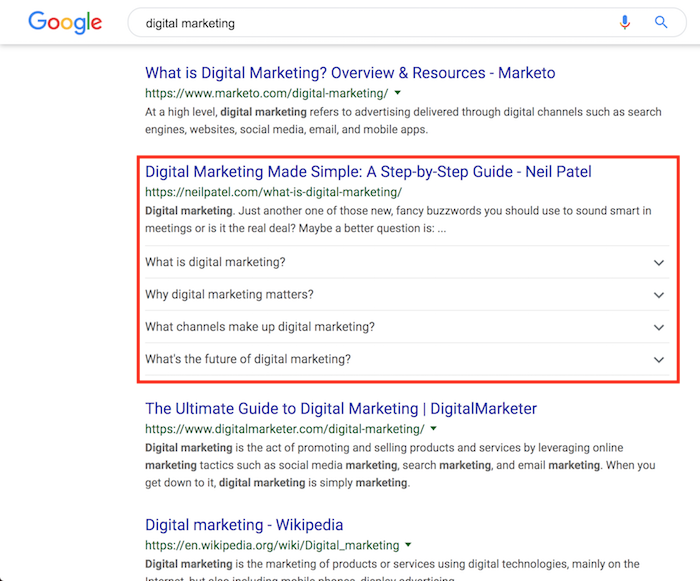
<p>We open Notepad or any other text edtor and start typing this code inside:</p>
<pre class="wp-block-code" data-no-auto-translation=""><code class="language-markup"><!doctype html>
<html>
<head>
<title>My first web page</title>
</head>
<body></body>
</html></code></pre>
<figure class="wp-block-image"><img loading="lazy" decoding="async" width="600" height="400" src="https://www.francescopepe.com/wp-content/uploads/2019/07/tutorial_html_02.png" alt="first page html" class="wp-image-133" srcset="https://www.francescopepe.com/wp-content/uploads/2019/07/tutorial_html_02.png 600w, https://www.francescopepe.com/wp-content/uploads/2019/07/tutorial_html_02-300x200.png 300w" sizes="auto, (max-width: 600px) 100vw, 600px" /></figure>
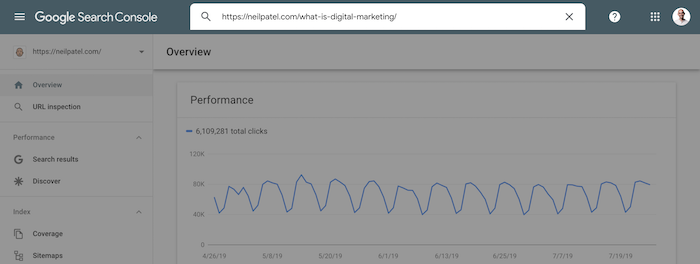
<p>Save as and remember to select "All files" in the drop-down box, after which we save as <strong>index.html</strong> o <strong>mypage.html</strong> Or whatever we like best. </p>
<figure class="wp-block-image"><img loading="lazy" decoding="async" width="960" height="540" src="https://www.francescopepe.com/wp-content/uploads/2019/07/tutorial_html_02-1.png" alt="" class="wp-image-135" srcset="https://www.francescopepe.com/wp-content/uploads/2019/07/tutorial_html_02-1.png 960w, https://www.francescopepe.com/wp-content/uploads/2019/07/tutorial_html_02-1-300x169.png 300w, https://www.francescopepe.com/wp-content/uploads/2019/07/tutorial_html_02-1-768x432.png 768w" sizes="auto, (max-width: 960px) 100vw, 960px" /></figure>
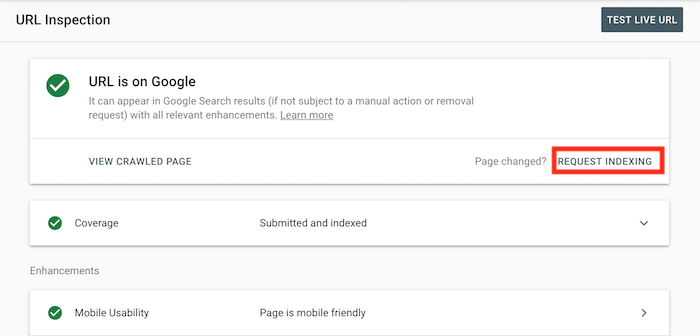
<p>If we double-click on the file we just saved, a new browser window will open with our first html page. It will be a blank page, but it will have the title we entered in the tag <strong><title></strong>.</p>
<figure class="wp-block-image"><img loading="lazy" decoding="async" width="650" height="133" src="https://www.francescopepe.com/wp-content/uploads/2019/07/tutorial_html_03.png" alt="" class="wp-image-136" srcset="https://www.francescopepe.com/wp-content/uploads/2019/07/tutorial_html_03.png 650w, https://www.francescopepe.com/wp-content/uploads/2019/07/tutorial_html_03-300x61.png 300w" sizes="auto, (max-width: 650px) 100vw, 650px" /></figure>
<p>Let's go ahead and build the web page. Let's add a header and a few paragraphs. Let's apply the tag <strong><b></strong> to a few words to highlight, such as the name of the city of Birth, add a photo with the tag <strong><img></strong> and a link to the page on Wikipedia.</p>
<pre class="wp-block-code" data-no-auto-translation=""><code class="language-markup line-numbers"><!doctype html>
<html>
<head>
<title>My first web page</title>
</head>
<body>
<h1>Lionel Messi</h1>
<p>Lionel Andrés Messi, called simply Leo by many, was born on June 24, 1987 in <b>Rosario</b>, in the Argentine state of Santa Fe.
</p>
<img src="Messi.jpg" />
<p>He is only five years old when he starts kicking the ball for the first time. His first team is the <b>Grandoli</b>, a small soccer school in his town aimed at children. Coaching the boys is Jorge Messi, a metalworker employee and father of the future champion.
</p>
<p>At the age of seven <a href="https://it.wikipedia.org/wiki/Lionel_Messi">Lionel Messi</a> he wears the jersey of "Newell's Old Boys" and plays in the youth categories. To the eyes of the soccer fans who followed the young boy in the small fields of Rosario, the talent of the youngster was already clear.
</p>
<h2>The arrival in barcelona</h2>
<p>Because of a delay in the boy's bone development due to low levels of growth hormones in his body, the transition fades.
</p>
<p>Medical treatment is recommended to the family, but it is very expensive: it is reported to be $900 monthly; Jorge Messi asks for help from Newell's Old Boys and River Plate without getting adequate solutions. He strongly believes in Lionel's possible future as a champion: so he asks some foundations for help.
</p>
</body>
</html></code></pre>
<p>If we want to insert an image, we can save it in the same folder as the html file and retrieve it by entering the file name in the attribute <strong>src</strong> of the tag <strong><img></strong>.</p>
<p>If we have done everything correctly, we should get something like this:</p>
<figure class="wp-block-image"><img loading="lazy" decoding="async" width="902" height="654" src="https://www.francescopepe.com/wp-content/uploads/2019/07/tutorial_html_04.png" alt="" class="wp-image-146" srcset="https://www.francescopepe.com/wp-content/uploads/2019/07/tutorial_html_04.png 902w, https://www.francescopepe.com/wp-content/uploads/2019/07/tutorial_html_04-300x218.png 300w, https://www.francescopepe.com/wp-content/uploads/2019/07/tutorial_html_04-768x557.png 768w" sizes="auto, (max-width: 902px) 100vw, 902px" /></figure>
<p>In this brief guide on HTML we have seen how to make a web page, add text and images, format a header and bold text, and add links. </p>
<p>To improve our page we will need to change its appearance, using the <strong>CSS</strong>. This will be the subject of a future guide.</p>
</div>
<hr class="wp-block-separator has-text-color has-border-light-color has-alpha-channel-opacity has-border-light-background-color has-background is-style-separator-thin" style="margin-top:var(--wp--preset--spacing--x-large);margin-bottom:var(--wp--preset--spacing--x-large)"/>
</div>
</li><li class="wp-block-post post-19 post type-post status-publish format-standard has-post-thumbnail hentry category-wordpress">
<div class="wp-block-group has-global-padding is-layout-constrained wp-container-core-group-is-layout-4b99461e wp-block-group-is-layout-constrained">
<div class="wp-block-group has-global-padding is-layout-constrained wp-container-core-group-is-layout-4b99461e wp-block-group-is-layout-constrained"><div style="font-style:normal;font-weight:500" class="taxonomy-category has-link-color wp-elements-dc029530ae85985093705fae8a40dd3d wp-block-post-terms has-small-font-size"><a href="https://www.francescopepe.com/en/wordpress/" rel="tag">WordPress</a></div>
<h2 class="wp-block-post-title has-x-large-font-size"><a href="https://www.francescopepe.com/en/difference-between-wordpress-com-and-org/" target="_self" >What is the difference between WordPress.org and WordPress.com?</a></h2>
<div class="wp-block-group has-secondary-color has-text-color has-small-font-size is-layout-flex wp-container-core-group-is-layout-b56ea84c wp-block-group-is-layout-flex" style="font-style:normal;font-weight:500"><div class="wp-block-post-author"><div class="wp-block-post-author__avatar"><img alt='' src='https://secure.gravatar.com/avatar/660288424706c1e81cdfa984813e860d815034a29d8f74fe11d34010ddd652c8?s=48&d=mm&r=g' srcset='https://secure.gravatar.com/avatar/660288424706c1e81cdfa984813e860d815034a29d8f74fe11d34010ddd652c8?s=96&d=mm&r=g 2x' class='avatar avatar-48 photo' height='48' width='48' loading='lazy' decoding='async'/></div><div class="wp-block-post-author__content"><p class="wp-block-post-author__name">Francesco</p></div></div>
<p class="has-secondary-color has-text-color" data-no-translation="" data-trp-gettext="">·</p>
<div class="wp-block-post-date"><time datetime="2018-09-08T23:22:45+00:00">September 8, 2018</time></div></div>
</div>
<figure style="margin-top:var(--wp--preset--spacing--large);" class="wp-block-post-featured-image"><a href="https://www.francescopepe.com/en/difference-between-wordpress-com-and-org/" target="_self" ><img width="1024" height="627" src="https://www.francescopepe.com/wp-content/uploads/2018/09/WordPress.org-or-WordPress.com_.jpg" class="attachment-post-thumbnail size-post-thumbnail wp-post-image" alt="What is the difference between WordPress.org and WordPress.com?" style="border-radius:5px;object-fit:cover;" decoding="async" loading="lazy" srcset="https://www.francescopepe.com/wp-content/uploads/2018/09/WordPress.org-or-WordPress.com_.jpg 1024w, https://www.francescopepe.com/wp-content/uploads/2018/09/WordPress.org-or-WordPress.com_-300x184.jpg 300w, https://www.francescopepe.com/wp-content/uploads/2018/09/WordPress.org-or-WordPress.com_-768x470.jpg 768w" sizes="auto, (max-width: 1024px) 100vw, 1024px" /></a></figure>
<div class="entry-content wp-block-post-content is-layout-flow wp-block-post-content-is-layout-flow">
<p>Many users get confused when looking for information about WordPress. In fact, although they have the same name, <strong><a href="https://it.wordpress.com/">WordPress.com</a></strong> e <strong><a href="https://it.wordpress.org/">WordPress.org</a></strong> Are two different things.</p>
<p>To fully understand what we are talking about, we must first understand what is <strong>WordPress</strong>.</p>
<h2 class="wp-block-heading" id="cose-wordpress">What is WordPress?</h2>
<p><a href="https://wordpress.org/">WordPress</a> is an open source software created by <a href="https://it.wikipedia.org/wiki/Matt_Mullenweg">Matt Mullenweg</a> For the creation of a personal blog. Over time <strong>WordPress</strong> has been enriched with new features, becoming a comprehensive CMS thanks to the support of the developer community, which in addition to contributing to code development has created an ecosystem of <strong><a href="https://it.wordpress.org/plugins/">plugins</a></strong> expanding its potential, as well as a vast repertoire of <a href="https://it.wordpress.org/themes/">themes</a>.</p>
<p>There are thousands of plugins for every need, they are free but there are also paid ones. I have also developed a <a href="https://wordpress.org/plugins/search-console/">plugin that allows you to view data from Google Search Console</a> within the WordPress administration dashboard.</p>
<h2 class="wp-block-heading" id="cose-wordpressorg-la-versione-selfhosted">What is WordPress.org: the self-hosted version</h2>
<p>As mentioned WordPress is an open source software that can be freely downloaded by everyone by going to the <a href="https://it.wordpress.org/">official website</a>: you can install it on your own server, customize it and use its full potential.</p>
<p>This therefore implies that you have to have your own <strong>domain</strong> and one of your own <strong>server</strong> Where to install the software.</p>
<p>The requirements for installing WordPress on your server are minimal: you just need to have PHP and MySql enabled and you can proceed with the installation. </p>
<p>Almost all hosting services also allow you to install WordPress through a convenient server management panel, which in most cases is <strong>cPanel</strong>.</p>
<p>Even a beginner can easily create his or her own blog in minutes and take advantage of the full potential of WordPress.</p>
<p>In fact, even if you are a beginner, you will have no problem making your own professional blog completely independently.</p>
<p>As already mentioned you can choose your favorite theme with which to customize the appearance of your blog: there are free and paid themes, there is an almost unlimited choice.</p>
<p>In addition, you can extend your blog with an unlimited set of plugins that add a variety of features, the most diverse.</p>
<p>There are plugins for managing SEO, speeding up the site, creating forms and newsletters, turning the blog into an ecommerce, and more.</p>
<p>As mentioned you must have a domain and hosting on which to host your blog: currently the <strong><ta href="https://www.francescopepe.com/go/siteground/" linkid="167">best hosting service is Siteground</ta></strong>.</p>
<h2 class="wp-block-heading" id="cose-wordpresscom-la-versione-hosted">What is WordPress.com: the hosted version</h2>
<p>WordPress.com is a service that allows you to create a WordPress blog without having to download anything. It is basically a SaaS (software as a service).</p>
<p>This means you won't have to install anything, WordPress is already installed.</p>
<p>Therefore, it is not necessary to have a domain and hosting plan. </p>
<p>This might seem like a good solution if you have few technical skills and a limited budget.</p>
<p>In reality you will have limitations that will prevent you from taking full advantage of the full potential of WordPress.</p>
<h2 class="wp-block-heading" id="le-differenze-tra-wordpressorg-e-wordpresscom">The differences between WordPress.org and WordPress.com</h2>
<p>After a quick overview of the two versions, let's look at what the main differences are in more detail so you can make the right choice for starting your blog. </p>
<h2 class="wp-block-heading" id="dominio">Domain</h2>
<p>To start curating your online presence you will need a domain name. </p>
<h3 class="wp-block-heading" id="wordpressorg">WordPress.org</h3>
<p>The cost of a domain is around 10€ per year. You can save the cost of the domain if you request it at the same time as activating a hosting plan on <ta linkid="167" href="https://www.francescopepe.com/go/siteground/"><strong>SiteGround</strong></ta>: The domain is offered free of charge.</p>
<p>You can then have a site reachable at "<em>ilmiosito.it</em>“.</p>
<h3 class="wp-block-heading" id="wordpresscom">WordPress.com</h3>
<p>On WordPress.com you will only be able to have a third-level domain: e.g. "<em>ilmiosito.wordpress.com</em>". Obviously it is less eye-catching than a domain with only the name you have chosen.</p>
<p>If you want to use your own custom domain on WordPress.com you will have to subscribe to a subscription plan costing €4 per month. </p>
<p>So you will spend 48€ plus the cost of the domain.</p>
<h2 class="wp-block-heading" id="hosting">Hosting</h2>
<h3 class="wp-block-heading" id="wordpressorg-2">WordPress.org</h3>
<p>To run your blog independently you will need a hosting plan. Prices vary, but hover around €5 per month for good hosting.</p>
<p>Having your own hosting allows you to have so many advantages.</p>
<p>You will be able to independently manage all the files on your site, make changes to the CSS code, PHP or <a href="https://www.francescopepe.com/en/html-guide/">HTML</a>.</p>
<p>Hosting offers can be very varied and with different prices, but if you want to have the best then I recommend using <strong><ta linkid="167" href="https://www.francescopepe.com/go/siteground/">SiteGround</ta></strong>: this hosting is emerging as one of the best, especially for running WordPress sites, as it offers great performance, lots of backup space and top 24/24h support service.</p>
<h3 class="wp-block-heading" id="wordpresscom-2">WordPress.com</h3>
<p>On WordPress.com you will not need to buy hosting, because this is provided free of charge.</p>
<p>But you will not have access to edit files; you will be limited in making the customizations you want. To have some minimal control, you will have to subscribe to the business plan, which costs 8 euros per month. </p>
<p>You will understand that for the same cost, it is better to have your own hosting plan to take advantage of its full potential.</p>
<h2 class="wp-block-heading" id="spazio-di-memoria">Memory space</h2>
<h3 class="wp-block-heading" id="wordpressorg-3">WordPress.org</h3>
<p>It varies depending on the hosting you choose. At <strong><ta href="https://www.francescopepe.com/go/siteground/" linkid="167">SiteGround</ta></strong> for example is of <strong>10GB</strong>.</p>
<h3 class="wp-block-heading" id="wordpresscom-3">WordPress.com</h3>
<p>The free version offers <strong>3GB</strong> of space. To increase it, one must upgrade to the paid versions.</p>
<h2 class="wp-block-heading" id="plugin-e-temi">Plugins and Themes</h2>
<p>Here is the sorest note of all.</p>
<p>At <strong>WordPress.com</strong> In fact, you won't be able to install any plugins. Suffice it to say that you won't even be able to use such basic plugins as <strong><a href="https://yoast.com/">Yoast Seo</a></strong> o <a href="https://wpforms.com/"><strong>WpForms</strong></a>.</p>
<p>You will also be limited in your use of Google Analytics unless you subscribe to a paid plan.</p>
<p>Same goes for themes. With the hosted version you will have so many limitations and you will not be able to install the best WordPress themes, but you will be limited to the free ones.</p>
<p>This infographic can simplify the points we have analyzed for you.</p>
<figure class="wp-block-image is-style-default"><img loading="lazy" decoding="async" width="960" height="689" src="https://www.francescopepe.com/wp-content/uploads/2019/07/com-vs-org.png" alt="WordPress.com vs WordPress.org" class="wp-image-180" srcset="https://www.francescopepe.com/wp-content/uploads/2019/07/com-vs-org.png 960w, https://www.francescopepe.com/wp-content/uploads/2019/07/com-vs-org-300x215.png 300w, https://www.francescopepe.com/wp-content/uploads/2019/07/com-vs-org-768x551.png 768w" sizes="auto, (max-width: 960px) 100vw, 960px" /><figcaption class="wp-element-caption">Differences between WordPress.com and WordPress.org</figcaption></figure>
<p>As you may have realized, my preference undoubtedly goes to the self-hosted version i.e. WordPress.org. </p>
<p>Unless you want to create a simple amateur blog to share your thoughts and have an online space without thinking about monetizing it, my advice is to definitely go for WordPress.org.</p>
<p>Also for the same price, should you decide to opt for WordPress.com, you will have less freedom to better manage your blog.</p>
</div>
<hr class="wp-block-separator has-text-color has-border-light-color has-alpha-channel-opacity has-border-light-background-color has-background is-style-separator-thin" style="margin-top:var(--wp--preset--spacing--x-large);margin-bottom:var(--wp--preset--spacing--x-large)"/>
</div>
</li><li class="wp-block-post post-17 post type-post status-publish format-standard has-post-thumbnail hentry category-wordpress">
<div class="wp-block-group has-global-padding is-layout-constrained wp-container-core-group-is-layout-4b99461e wp-block-group-is-layout-constrained">
<div class="wp-block-group has-global-padding is-layout-constrained wp-container-core-group-is-layout-4b99461e wp-block-group-is-layout-constrained"><div style="font-style:normal;font-weight:500" class="taxonomy-category has-link-color wp-elements-dc029530ae85985093705fae8a40dd3d wp-block-post-terms has-small-font-size"><a href="https://www.francescopepe.com/en/wordpress/" rel="tag">WordPress</a></div>
<h2 class="wp-block-post-title has-x-large-font-size"><a href="https://www.francescopepe.com/en/how-to-improve-wordpress-security/" target="_self" >How to improve WordPress security without plugins</a></h2>
<div class="wp-block-group has-secondary-color has-text-color has-small-font-size is-layout-flex wp-container-core-group-is-layout-b56ea84c wp-block-group-is-layout-flex" style="font-style:normal;font-weight:500"><div class="wp-block-post-author"><div class="wp-block-post-author__avatar"><img alt='' src='https://secure.gravatar.com/avatar/660288424706c1e81cdfa984813e860d815034a29d8f74fe11d34010ddd652c8?s=48&d=mm&r=g' srcset='https://secure.gravatar.com/avatar/660288424706c1e81cdfa984813e860d815034a29d8f74fe11d34010ddd652c8?s=96&d=mm&r=g 2x' class='avatar avatar-48 photo' height='48' width='48' loading='lazy' decoding='async'/></div><div class="wp-block-post-author__content"><p class="wp-block-post-author__name">Francesco</p></div></div>
<p class="has-secondary-color has-text-color" data-no-translation="" data-trp-gettext="">·</p>
<div class="wp-block-post-date"><time datetime="2018-09-08T23:22:36+00:00">September 8, 2018</time></div></div>
</div>
<figure style="margin-top:var(--wp--preset--spacing--large);" class="wp-block-post-featured-image"><a href="https://www.francescopepe.com/en/how-to-improve-wordpress-security/" target="_self" ><img width="700" height="400" src="https://www.francescopepe.com/wp-content/uploads/2018/09/security.png" class="attachment-post-thumbnail size-post-thumbnail wp-post-image" alt="How to improve WordPress security without plugins" style="border-radius:5px;object-fit:cover;" decoding="async" loading="lazy" srcset="https://www.francescopepe.com/wp-content/uploads/2018/09/security.png 700w, https://www.francescopepe.com/wp-content/uploads/2018/09/security-300x171.png 300w" sizes="auto, (max-width: 700px) 100vw, 700px" /></a></figure>
<div class="entry-content wp-block-post-content is-layout-flow wp-block-post-content-is-layout-flow">
<p><a href="https://wordpress.org">WordPress</a> is the most widely used content management system in the world. One third of the world's sites are developed on this platform.</p>
<p>This makes it a perfect prey for <a href="https://it.wikipedia.org/wiki/Hacker#Classificazione">hacker</a> e <a href="https://it.wikipedia.org/wiki/Spam">spammer</a>. </p>
<p>Fortunately, security in WordPress is held in high regard, and developers have implemented all possible measures to prevent a site from being "<strong>laundry</strong>" by ill-intentioned people.</p>
<p>In spite of this, we can implement small steps to make our installation more secure. And without the use of plugins!</p>
<h2 class="wp-block-heading" id="aggiorna-wordpress">Update WordPress</h2>
<p>Keeping our CMS up-to-date is the most important thing. WordPress is constantly updated with all patches to fix any security issues.</p>
<p>Most WordPress updates in fact consist of the following. <strong>bugfixes and security patches</strong>.</p>
<p>For the lazy ones it is worth mentioning that from version 3.7 WordPress can receive automatic updates. To activate this convenient option just go into the <strong>wp-config.php</strong> and add or modify the following line of code:</p>
<pre class="wp-block-code" data-no-auto-translation=""><code class="language-powershell line-numbers">define( 'WP_AUTO_UPDATE_CORE', true );</code></pre>
<h2 class="wp-block-heading" id="cancella-temi-e-plugin-inutilizzati">Delete unused themes and plugins</h2>
<p>It may happen that you have installed a plugin or theme that then for one reason or another was no longer used. In fact, having unused plugins and themes in addition to increasing the space taken up on disk, can lead to an increased risk of exposing your site to attacks. </p>
<p>Limit installation of plugins to those you need and use regularly.</p>
<h2 class="wp-block-heading" id="cancella-lutente-admin">Delete user admin</h2>
<p>By default many WordPress installations create the admin user. In the case of brute force there will be many attempts to log in using this account.</p>
<p>To improve security, the admin account should be deleted and replaced with a less obvious name.</p>
<h2 class="wp-block-heading" id="usa-password-efficaci">Use effective passwords</h2>
<p>Obvious but never trite, the advice to use a password that is difficult to guess is an evergreen. </p>
<p>Don't use the simplest password you remember, such as "<strong>mario83</strong>", but strive to use one that combines uppercase letters, lowercase letters, numbers, and special characters.</p>
<p>You could use one like "<strong>!lm10Gatt0s!CH1am4G1g1o</strong>". This is a <strong>passphrase</strong> and you could use a similar one using a phrase you can easily remember.</p>
<p>WordPress assigns a value for each password entered, try to use a level one <strong>strong</strong>.</p>
<h2 class="wp-block-heading" id="permessi-di-files-e-cartelle">File and folder permissions</h2>
<p>Proper installation of WordPress also requires taking into account the permissions of files and folders. For optimal configuration all folders should be <strong>755</strong> and the files <strong>644</strong>, the wp-config.php should be set with permissions<strong> 400</strong>.</p>
<figure class="wp-block-table"><table><tbody><tr><td><strong>Files/Folders</strong></td><td><strong>Permissions</strong></td></tr><tr><td>wp-content</td><td>755</td></tr><tr><td>wp-admin</td><td>755</td></tr><tr><td>wp-includes</td><td>644</td></tr><tr><td>All .php files</td><td>644</td></tr><tr><td>wp-config.php (public_html folder)</td><td>400</td></tr><tr><td>index.php (public_html folder)</td><td>644</td></tr></tbody></table></figure>
<h2 class="wp-block-heading" id="usa-le-wordpress-key">Use WordPress keys</h2>
<p>Make sure that in your file <strong>wp-config.php</strong> WordPress keys have been created. These global variables are used to improve the protection system by encrypting the cookies that reside on the browser.</p>
<p>They are generated during installation on almost every hosting, but in case they are not present in your wp-config.php, you can create them by going to <a href="https://api.wordpress.org/secret-key/1.1/">https://api.wordpress.org/secret-key/1.1/</a>.</p>
<pre title="wp-config.php" class="wp-block-code" data-no-auto-translation=""><code lang="php" class="language-php">define('AUTH_KEY', 'Mi@A%m`3adaTJ@#sL+{nq-WhrOwyCH|I(3k>NEoT=2+-.Fs^B*8*K|[jJ_GlQ~q[');
define('SECURE_AUTH_KEY', 'ag-?YfLW!<gYt~EtGRWD3?jp@h#8fW&cVb50FSL=6?)$ps?N8t*&]2U5jvZ4{wnQ');
define('LOGGED_IN_KEY', '++@dhNqKK8uv9OUM|-u^i>/sZt.2]-X(^n>i/+;vf!Fw;Dl(,<v.H>kV1+D-h:C7');
define('NONCE_KEY', 'WSR]KMRL%6<y|#0.] =r^W4PPse].T<g#S00It^O!BX%BBq0:XAYOg#g33[ZWlT<');</code></pre>
<h2 class="wp-block-heading" id="fai-un-backup-del-database">Make a backup of the database</h2>
<p>Backup is a critical thing. It may seem obvious, but many people underestimate the importance of having a backup in case the site is compromised.</p>
<p>By now, all hosting offers automatic backups, the periodic cadence of which you can set to your liking, so you can always be sure not to lose the work you have done.</p>
</div>
<hr class="wp-block-separator has-text-color has-border-light-color has-alpha-channel-opacity has-border-light-background-color has-background is-style-separator-thin" style="margin-top:var(--wp--preset--spacing--x-large);margin-bottom:var(--wp--preset--spacing--x-large)"/>
</div>
</li></ul>
<div class="wp-block-group has-global-padding is-layout-constrained wp-block-group-is-layout-constrained"></div>
</div>
</div>
</main>
<footer class="site-footer wp-block-template-part">
<footer class="wp-block-group alignfull has-main-color has-base-background-color has-text-color has-background has-link-color wp-elements-da5a7e944c833a7e596099de9e0e4e4a has-global-padding is-layout-constrained wp-container-core-group-is-layout-d3460c8d wp-block-group-is-layout-constrained" style="border-top-color:var(--wp--preset--color--border-light);border-top-width:1px;margin-top:0px;padding-top:var(--wp--preset--spacing--xx-large);padding-right:var(--wp--preset--spacing--medium);padding-bottom:var(--wp--preset--spacing--xx-large);padding-left:var(--wp--preset--spacing--medium)">
<div class="wp-block-columns alignwide is-layout-flex wp-container-core-columns-is-layout-010e51cd wp-block-columns-is-layout-flex">
<div class="wp-block-column is-layout-flow wp-block-column-is-layout-flow"><p class="has-link-color wp-elements-f89e54a87e09ad25ba6ef7404bf88732 wp-block-site-title has-text-color has-main-color">Francis Pepe</p>
<p class="has-small-font-size">Easily create beautiful, fully-customizable websites with the new WordPress Site Editor and the Ollie block theme. No coding skills required. Download for free today!</p>
<ul class="wp-block-social-links has-icon-color has-icon-background-color is-style-default is-content-justification-left is-layout-flex wp-container-core-social-links-is-layout-d893daad wp-block-social-links-is-layout-flex"><li style="color:#fff;background-color:#14111f;" class="wp-social-link wp-social-link-twitter has-base-color has-main-background-color wp-block-social-link"><a href="#" class="wp-block-social-link-anchor"><svg width="24" height="24" viewbox="0 0 24 24" version="1.1" xmlns="http://www.w3.org/2000/svg" aria-hidden="true" focusable="false"><path d="M22.23,5.924c-0.736,0.326-1.527,0.547-2.357,0.646c0.847-0.508,1.498-1.312,1.804-2.27 c-0.793,0.47-1.671,0.812-2.606,0.996C18.324,4.498,17.257,4,16.077,4c-2.266,0-4.103,1.837-4.103,4.103 c0,0.322,0.036,0.635,0.106,0.935C8.67,8.867,5.647,7.234,3.623,4.751C3.27,5.357,3.067,6.062,3.067,6.814 c0,1.424,0.724,2.679,1.825,3.415c-0.673-0.021-1.305-0.206-1.859-0.513c0,0.017,0,0.034,0,0.052c0,1.988,1.414,3.647,3.292,4.023 c-0.344,0.094-0.707,0.144-1.081,0.144c-0.264,0-0.521-0.026-0.772-0.074c0.522,1.63,2.038,2.816,3.833,2.85 c-1.404,1.1-3.174,1.756-5.096,1.756c-0.331,0-0.658-0.019-0.979-0.057c1.816,1.164,3.973,1.843,6.29,1.843 c7.547,0,11.675-6.252,11.675-11.675c0-0.178-0.004-0.355-0.012-0.531C20.985,7.47,21.68,6.747,22.23,5.924z"></path></svg><span class="wp-block-social-link-label screen-reader-text" data-no-translation="" data-trp-gettext="">Twitter</span></a></li>
<li style="color:#fff;background-color:#14111f;" class="wp-social-link wp-social-link-instagram has-base-color has-main-background-color wp-block-social-link"><a href="#" class="wp-block-social-link-anchor"><svg width="24" height="24" viewbox="0 0 24 24" version="1.1" xmlns="http://www.w3.org/2000/svg" aria-hidden="true" focusable="false"><path d="M12,4.622c2.403,0,2.688,0.009,3.637,0.052c0.877,0.04,1.354,0.187,1.671,0.31c0.42,0.163,0.72,0.358,1.035,0.673 c0.315,0.315,0.51,0.615,0.673,1.035c0.123,0.317,0.27,0.794,0.31,1.671c0.043,0.949,0.052,1.234,0.052,3.637 s-0.009,2.688-0.052,3.637c-0.04,0.877-0.187,1.354-0.31,1.671c-0.163,0.42-0.358,0.72-0.673,1.035 c-0.315,0.315-0.615,0.51-1.035,0.673c-0.317,0.123-0.794,0.27-1.671,0.31c-0.949,0.043-1.233,0.052-3.637,0.052 s-2.688-0.009-3.637-0.052c-0.877-0.04-1.354-0.187-1.671-0.31c-0.42-0.163-0.72-0.358-1.035-0.673 c-0.315-0.315-0.51-0.615-0.673-1.035c-0.123-0.317-0.27-0.794-0.31-1.671C4.631,14.688,4.622,14.403,4.622,12 s0.009-2.688,0.052-3.637c0.04-0.877,0.187-1.354,0.31-1.671c0.163-0.42,0.358-0.72,0.673-1.035 c0.315-0.315,0.615-0.51,1.035-0.673c0.317-0.123,0.794-0.27,1.671-0.31C9.312,4.631,9.597,4.622,12,4.622 M12,3 C9.556,3,9.249,3.01,8.289,3.054C7.331,3.098,6.677,3.25,6.105,3.472C5.513,3.702,5.011,4.01,4.511,4.511 c-0.5,0.5-0.808,1.002-1.038,1.594C3.25,6.677,3.098,7.331,3.054,8.289C3.01,9.249,3,9.556,3,12c0,2.444,0.01,2.751,0.054,3.711 c0.044,0.958,0.196,1.612,0.418,2.185c0.23,0.592,0.538,1.094,1.038,1.594c0.5,0.5,1.002,0.808,1.594,1.038 c0.572,0.222,1.227,0.375,2.185,0.418C9.249,20.99,9.556,21,12,21s2.751-0.01,3.711-0.054c0.958-0.044,1.612-0.196,2.185-0.418 c0.592-0.23,1.094-0.538,1.594-1.038c0.5-0.5,0.808-1.002,1.038-1.594c0.222-0.572,0.375-1.227,0.418-2.185 C20.99,14.751,21,14.444,21,12s-0.01-2.751-0.054-3.711c-0.044-0.958-0.196-1.612-0.418-2.185c-0.23-0.592-0.538-1.094-1.038-1.594 c-0.5-0.5-1.002-0.808-1.594-1.038c-0.572-0.222-1.227-0.375-2.185-0.418C14.751,3.01,14.444,3,12,3L12,3z M12,7.378 c-2.552,0-4.622,2.069-4.622,4.622S9.448,16.622,12,16.622s4.622-2.069,4.622-4.622S14.552,7.378,12,7.378z M12,15 c-1.657,0-3-1.343-3-3s1.343-3,3-3s3,1.343,3,3S13.657,15,12,15z M16.804,6.116c-0.596,0-1.08,0.484-1.08,1.08 s0.484,1.08,1.08,1.08c0.596,0,1.08-0.484,1.08-1.08S17.401,6.116,16.804,6.116z"></path></svg><span class="wp-block-social-link-label screen-reader-text" data-no-translation="" data-trp-gettext="">Instagram</span></a></li>
<li style="color:#fff;background-color:#14111f;" class="wp-social-link wp-social-link-linkedin has-base-color has-main-background-color wp-block-social-link"><a href="#" class="wp-block-social-link-anchor"><svg width="24" height="24" viewbox="0 0 24 24" version="1.1" xmlns="http://www.w3.org/2000/svg" aria-hidden="true" focusable="false"><path d="M19.7,3H4.3C3.582,3,3,3.582,3,4.3v15.4C3,20.418,3.582,21,4.3,21h15.4c0.718,0,1.3-0.582,1.3-1.3V4.3 C21,3.582,20.418,3,19.7,3z M8.339,18.338H5.667v-8.59h2.672V18.338z M7.004,8.574c-0.857,0-1.549-0.694-1.549-1.548 c0-0.855,0.691-1.548,1.549-1.548c0.854,0,1.547,0.694,1.547,1.548C8.551,7.881,7.858,8.574,7.004,8.574z M18.339,18.338h-2.669 v-4.177c0-0.996-0.017-2.278-1.387-2.278c-1.389,0-1.601,1.086-1.601,2.206v4.249h-2.667v-8.59h2.559v1.174h0.037 c0.356-0.675,1.227-1.387,2.526-1.387c2.703,0,3.203,1.779,3.203,4.092V18.338z"></path></svg><span class="wp-block-social-link-label screen-reader-text" data-no-translation="" data-trp-gettext="">LinkedIn</span></a></li>
<li style="color:#fff;background-color:#14111f;" class="wp-social-link wp-social-link-facebook has-base-color has-main-background-color wp-block-social-link"><a href="#" class="wp-block-social-link-anchor"><svg width="24" height="24" viewbox="0 0 24 24" version="1.1" xmlns="http://www.w3.org/2000/svg" aria-hidden="true" focusable="false"><path d="M12 2C6.5 2 2 6.5 2 12c0 5 3.7 9.1 8.4 9.9v-7H7.9V12h2.5V9.8c0-2.5 1.5-3.9 3.8-3.9 1.1 0 2.2.2 2.2.2v2.5h-1.3c-1.2 0-1.6.8-1.6 1.6V12h2.8l-.4 2.9h-2.3v7C18.3 21.1 22 17 22 12c0-5.5-4.5-10-10-10z"></path></svg><span class="wp-block-social-link-label screen-reader-text" data-no-translation="" data-trp-gettext="">Facebook</span></a></li></ul>
</div>
<div class="wp-block-column is-layout-flow wp-block-column-is-layout-flow">
<div class="wp-block-columns is-layout-flex wp-container-core-columns-is-layout-28f84493 wp-block-columns-is-layout-flex">
<div class="wp-block-column is-layout-flow wp-block-column-is-layout-flow">
<p style="font-style:normal;font-weight:600">Company</p>
<div class="wp-block-group has-small-font-size has-global-padding is-layout-constrained wp-container-core-group-is-layout-f5f3bcb8 wp-block-group-is-layout-constrained">
<p>About</p>
<p>Careers</p>
<p>Brand Assets</p>
<p>Contact</p>
</div>
</div>
<div class="wp-block-column is-layout-flow wp-block-column-is-layout-flow">
<p style="font-style:normal;font-weight:600">Resources</p>
<div class="wp-block-group has-small-font-size has-global-padding is-layout-constrained wp-container-core-group-is-layout-f5f3bcb8 wp-block-group-is-layout-constrained">
<p>Blog</p>
<p>Contact</p>
<p>Support Docs</p>
<p>Get Help</p>
</div>
</div>
<div class="wp-block-column is-layout-flow wp-block-column-is-layout-flow">
<p style="font-style:normal;font-weight:600">Product</p>
<div class="wp-block-group has-small-font-size has-global-padding is-layout-constrained wp-container-core-group-is-layout-f5f3bcb8 wp-block-group-is-layout-constrained">
<p>Features</p>
<p>Pricing</p>
<p>Use Cases</p>
<p>Demo</p>
</div>
</div>
</div>
</div>
</div>
<div class="wp-block-group alignwide has-secondary-color has-text-color has-link-color wp-elements-5e0e5debb1bea18d0a002bf19dd12e0c is-layout-flow wp-block-group-is-layout-flow" style="padding-top:40px">
<div class="wp-block-group is-content-justification-space-between is-layout-flex wp-container-core-group-is-layout-289c189c wp-block-group-is-layout-flex">
<p class="has-small-font-size">© 2025<strong>-</strong> Powered by WordPress and <a href="https://olliewp.com">Ollie</a></p>
<div class="wp-block-group has-small-font-size is-nowrap is-layout-flex wp-container-core-group-is-layout-1b11d160 wp-block-group-is-layout-flex">
<p>Download</p>
<p>Visit Ollie</p>
<p>Visit Mike</p>
</div>
</div>
</div>
</footer>
</footer>
</div>
<template id="tp-language" data-tp-language="en_US"></template><script type="speculationrules">
{"prefetch":[{"source":"document","where":{"and":[{"href_matches":"/en/*"},{"not":{"href_matches":["/wp-*.php","/wp-admin/*","/wp-content/uploads/*","/wp-content/*","/wp-content/plugins/*","/wp-content/themes/ollie/*","/en/*\\?(.+)"]}},{"not":{"selector_matches":"a[rel~=\"nofollow\"]"}},{"not":{"selector_matches":".no-prefetch, .no-prefetch a"}}]},"eagerness":"conservative"}]}
</script>
<div id="trp-floater-ls" onclick="" data-no-translation class="trp-language-switcher-container trp-floater-ls-names trp-bottom-right trp-color-dark flags-full-names" >
<div id="trp-floater-ls-current-language" class="trp-with-flags">
<a href="#" class="trp-floater-ls-disabled-language trp-ls-disabled-language" onclick="event.preventDefault()">
<img class="trp-flag-image" src="https://www.francescopepe.com/wp-content/plugins/translatepress-multilingual/assets/images/flags/en_US.png" width="18" height="12" alt="en_US" title="English">English </a>
</div>
<div id="trp-floater-ls-language-list" class="trp-with-flags" >
<div class="trp-language-wrap trp-language-wrap-bottom"> <a href="https://www.francescopepe.com/?query-23-page=1"
title="Italian">
<img class="trp-flag-image" src="https://www.francescopepe.com/wp-content/plugins/translatepress-multilingual/assets/images/flags/it_IT.png" width="18" height="12" alt="it_IT" title="Italian">Italian </a>
<a href="https://www.francescopepe.com/es/?query-23-page=1"
title="Spanish">
<img class="trp-flag-image" src="https://www.francescopepe.com/wp-content/plugins/translatepress-multilingual/assets/images/flags/es_ES.png" width="18" height="12" alt="es_ES" title="Spanish">Spanish </a>
<a href="#" class="trp-floater-ls-disabled-language trp-ls-disabled-language" onclick="event.preventDefault()"><img class="trp-flag-image" src="https://www.francescopepe.com/wp-content/plugins/translatepress-multilingual/assets/images/flags/en_US.png" width="18" height="12" alt="en_US" title="English">English</a></div> </div>
</div>
<!-- Consent Management powered by Complianz | GDPR/CCPA Cookie Consent https://wordpress.org/plugins/complianz-gdpr -->
<div id="cmplz-cookiebanner-container"><div class="cmplz-cookiebanner cmplz-hidden banner-1 banner-a optin cmplz-bottom-right cmplz-categories-type-no" aria-modal="true" data-nosnippet="true" role="dialog" aria-live="polite" aria-labelledby="cmplz-header-1-optin" aria-describedby="cmplz-message-1-optin">
<div class="cmplz-header">
<div class="cmplz-logo"><a href="https://www.francescopepe.com/en/" class="custom-logo-link" rel="home" aria-current="page"><img width="1250" height="1250" src="https://www.francescopepe.com/wp-content/uploads/2024/04/fp-logo.png" class="custom-logo" alt="Francis Pepe" decoding="async" fetchpriority="high" srcset="https://www.francescopepe.com/wp-content/uploads/2024/04/fp-logo.png 1250w, https://www.francescopepe.com/wp-content/uploads/2024/04/fp-logo-300x300.png 300w, https://www.francescopepe.com/wp-content/uploads/2024/04/fp-logo-1024x1024.png 1024w, https://www.francescopepe.com/wp-content/uploads/2024/04/fp-logo-150x150.png 150w, https://www.francescopepe.com/wp-content/uploads/2024/04/fp-logo-768x768.png 768w" sizes="(max-width: 1250px) 100vw, 1250px" /></a></div>
<div class="cmplz-title" id="cmplz-header-1-optin">Manage Consent</div>
<div class="cmplz-close" tabindex="0" role="button" aria-label="Close dialog" data-no-translation-aria-label="">
<svg aria-hidden="true" focusable="false" data-prefix="fas" data-icon="times" class="svg-inline--fa fa-times fa-w-11" role="img" xmlns="http://www.w3.org/2000/svg" viewbox="0 0 352 512"><path fill="currentColor" d="M242.72 256l100.07-100.07c12.28-12.28 12.28-32.19 0-44.48l-22.24-22.24c-12.28-12.28-32.19-12.28-44.48 0L176 189.28 75.93 89.21c-12.28-12.28-32.19-12.28-44.48 0L9.21 111.45c-12.28 12.28-12.28 32.19 0 44.48L109.28 256 9.21 356.07c-12.28 12.28-12.28 32.19 0 44.48l22.24 22.24c12.28 12.28 32.2 12.28 44.48 0L176 322.72l100.07 100.07c12.28 12.28 32.2 12.28 44.48 0l22.24-22.24c12.28-12.28 12.28-32.19 0-44.48L242.72 256z"></path></svg>
</div>
</div>
<div class="cmplz-divider cmplz-divider-header"></div>
<div class="cmplz-body">
<div class="cmplz-message" id="cmplz-message-1-optin">To provide the best experiences, we use technologies such as cookies to store and/or access device information. Consenting to these technologies will allow us to process data such as browsing behavior or unique IDs on this site. Not consenting or withdrawing consent may adversely affect some features and functions.</div>
<!-- categories start -->
<div class="cmplz-categories">
<details class="cmplz-category cmplz-functional" >
<summary>
<span class="cmplz-category-header">
<span class="cmplz-category-title">Functional</span>
<span class='cmplz-always-active'>
<span class="cmplz-banner-checkbox">
<input type="checkbox"
id="cmplz-functional-optin"
data-category="cmplz_functional"
class="cmplz-consent-checkbox cmplz-functional"
size="40"
value="1"/>
<label class="cmplz-label" for="cmplz-functional-optin"><span class="screen-reader-text">Functional</span></label>
</span>
Always active </span>
<span class="cmplz-icon cmplz-open">
<svg xmlns="http://www.w3.org/2000/svg" viewbox="0 0 448 512" height="18" ><path d="M224 416c-8.188 0-16.38-3.125-22.62-9.375l-192-192c-12.5-12.5-12.5-32.75 0-45.25s32.75-12.5 45.25 0L224 338.8l169.4-169.4c12.5-12.5 32.75-12.5 45.25 0s12.5 32.75 0 45.25l-192 192C240.4 412.9 232.2 416 224 416z"/></svg>
</span>
</span>
</summary>
<div class="cmplz-description">
<span class="cmplz-description-functional">Technical storage or access is strictly necessary for the legitimate purpose of enabling the use of a specific service explicitly requested by the subscriber or user, or for the sole purpose of carrying out the transmission of a communication over an electronic communications network.</span>
</div>
</details>
<details class="cmplz-category cmplz-preferences" >
<summary>
<span class="cmplz-category-header">
<span class="cmplz-category-title">Preferences</span>
<span class="cmplz-banner-checkbox">
<input type="checkbox"
id="cmplz-preferences-optin"
data-category="cmplz_preferences"
class="cmplz-consent-checkbox cmplz-preferences"
size="40"
value="1"/>
<label class="cmplz-label" for="cmplz-preferences-optin"><span class="screen-reader-text">Preferences</span></label>
</span>
<span class="cmplz-icon cmplz-open">
<svg xmlns="http://www.w3.org/2000/svg" viewbox="0 0 448 512" height="18" ><path d="M224 416c-8.188 0-16.38-3.125-22.62-9.375l-192-192c-12.5-12.5-12.5-32.75 0-45.25s32.75-12.5 45.25 0L224 338.8l169.4-169.4c12.5-12.5 32.75-12.5 45.25 0s12.5 32.75 0 45.25l-192 192C240.4 412.9 232.2 416 224 416z"/></svg>
</span>
</span>
</summary>
<div class="cmplz-description">
<span class="cmplz-description-preferences">Technical storage or access is necessary for the legitimate purpose of storing preferences that are not requested by the subscriber or user.</span>
</div>
</details>
<details class="cmplz-category cmplz-statistics" >
<summary>
<span class="cmplz-category-header">
<span class="cmplz-category-title">Statistics</span>
<span class="cmplz-banner-checkbox">
<input type="checkbox"
id="cmplz-statistics-optin"
data-category="cmplz_statistics"
class="cmplz-consent-checkbox cmplz-statistics"
size="40"
value="1"/>
<label class="cmplz-label" for="cmplz-statistics-optin"><span class="screen-reader-text">Statistics</span></label>
</span>
<span class="cmplz-icon cmplz-open">
<svg xmlns="http://www.w3.org/2000/svg" viewbox="0 0 448 512" height="18" ><path d="M224 416c-8.188 0-16.38-3.125-22.62-9.375l-192-192c-12.5-12.5-12.5-32.75 0-45.25s32.75-12.5 45.25 0L224 338.8l169.4-169.4c12.5-12.5 32.75-12.5 45.25 0s12.5 32.75 0 45.25l-192 192C240.4 412.9 232.2 416 224 416z"/></svg>
</span>
</span>
</summary>
<div class="cmplz-description">
<span class="cmplz-description-statistics">Technical storage or access that is used exclusively for statistical purposes.</span>
<span class="cmplz-description-statistics-anonymous">Technical storage or access that is used solely for anonymous statistical purposes. Without a subpoena, voluntary compliance by your Internet Service Provider, or additional records from third parties, information stored or retrieved for this purpose alone cannot usually be used for identification.</span>
</div>
</details>
<details class="cmplz-category cmplz-marketing" >
<summary>
<span class="cmplz-category-header">
<span class="cmplz-category-title">Marketing</span>
<span class="cmplz-banner-checkbox">
<input type="checkbox"
id="cmplz-marketing-optin"
data-category="cmplz_marketing"
class="cmplz-consent-checkbox cmplz-marketing"
size="40"
value="1"/>
<label class="cmplz-label" for="cmplz-marketing-optin"><span class="screen-reader-text">Marketing</span></label>
</span>
<span class="cmplz-icon cmplz-open">
<svg xmlns="http://www.w3.org/2000/svg" viewbox="0 0 448 512" height="18" ><path d="M224 416c-8.188 0-16.38-3.125-22.62-9.375l-192-192c-12.5-12.5-12.5-32.75 0-45.25s32.75-12.5 45.25 0L224 338.8l169.4-169.4c12.5-12.5 32.75-12.5 45.25 0s12.5 32.75 0 45.25l-192 192C240.4 412.9 232.2 416 224 416z"/></svg>
</span>
</span>
</summary>
<div class="cmplz-description">
<span class="cmplz-description-marketing">Technical storage or access is necessary to create user profiles to send advertisements, or to track the user on one website or several websites for similar marketing purposes.</span>
</div>
</details>
</div><!-- categories end -->
</div>
<div class="cmplz-links cmplz-information">
<ul>
<li><a class="cmplz-link cmplz-manage-options cookie-statement" href="#" data-relative_url="#cmplz-manage-consent-container" data-no-translation="" data-trp-gettext="">Manage options</a></li>
<li><a class="cmplz-link cmplz-manage-third-parties cookie-statement" href="#" data-relative_url="#cmplz-cookies-overview" data-no-translation="" data-trp-gettext="">Manage services</a></li>
<li><a class="cmplz-link cmplz-manage-vendors tcf cookie-statement" href="#" data-relative_url="#cmplz-tcf-wrapper" data-no-translation="" data-trp-gettext="">Manage {vendor_count} vendors</a></li>
<li><a class="cmplz-link cmplz-external cmplz-read-more-purposes tcf" target="_blank" rel="noopener noreferrer nofollow" href="https://cookiedatabase.org/tcf/purposes/" aria-label="Read more about TCF purposes on Cookie Database" data-no-translation="" data-trp-gettext="" data-no-translation-aria-label="">Read more about these purposes</a></li>
</ul>
</div>
<div class="cmplz-divider cmplz-footer"></div>
<div class="cmplz-buttons">
<button class="cmplz-btn cmplz-accept">Accept</button>
<button class="cmplz-btn cmplz-deny">Nega</button>
<button class="cmplz-btn cmplz-view-preferences">View preferences</button>
<button class="cmplz-btn cmplz-save-preferences">Save preferences</button>
<a class="cmplz-btn cmplz-manage-options tcf cookie-statement" href="#" data-relative_url="#cmplz-manage-consent-container">View preferences</a>
</div>
<div class="cmplz-documents cmplz-links">
<ul>
<li><a class="cmplz-link cookie-statement" href="#" data-relative_url="">{title}</a></li>
<li><a class="cmplz-link privacy-statement" href="#" data-relative_url="">{title}</a></li>
<li><a class="cmplz-link impressum" href="#" data-relative_url="">{title}</a></li>
</ul>
</div>
</div>
</div>
<div id="cmplz-manage-consent" data-nosnippet="true"><button class="cmplz-btn cmplz-hidden cmplz-manage-consent manage-consent-1">Manage Consent</button>
</div><script type="module" src="https://www.francescopepe.com/wp-content/plugins/formello/build/blocks/library/view.js?ver=5165da6a6d737a974593" id="formello-library-view-script-module-js-module" fetchpriority="low" data-wp-router-options="{"loadOnClientNavigation":true}"></script>
<script type="module" src="https://www.francescopepe.com/wp-content/plugins/popper/build/blocks/popper/frontend/view.js?ver=37385d1628579d604645" id="popper-popup-view-script-module-js-module" fetchpriority="low" data-wp-router-options="{"loadOnClientNavigation":true}"></script>
<script type="module" src="https://www.francescopepe.com/wp-includes/js/dist/script-modules/block-library/navigation/view.min.js?ver=b0f909c3ec791c383210" id="@wordpress/block-library/navigation/view-js-module" fetchpriority="low" data-wp-router-options="{"loadOnClientNavigation":true}"></script>
<script type="application/json" id="wp-script-module-data-@wordpress/interactivity">
{"config":{"formello":{"ajax_url":"https://www.francescopepe.com/wp-admin/admin-ajax.php","nonce":"5f534ae36c","settings":{"messages":{"form":{"success":"Thanks for submitting this form.","error":"Ops. An error occurred."},"missingValue":{"default":"Please fill out this field.","checkbox":"This field is required.","radio":"Please select a value.","select":"Please select a value.","select-multiple":"Please select at least one value."},"patternMismatch":{"email":"Please enter a valid email address.","url":"Please enter a URL.","number":"Please enter a number","color":"Please match the following format: #rrggbb","date":"Please use the YYYY-MM-DD format","time":"Please use the 24-hour time format. Ex. 23:00","month":"Please use the YYYY-MM format","default":"Please match the requested format."},"outOfRange":{"over":"Please select a value that is no more than {max}.","under":"Please select a value that is no less than {min}."},"wrongLength":{"over":"Please shorten this text to no more than {maxLength} characters. You are currently using {length} characters.","under":"Please lengthen this text to {minLength} characters or more. You are currently using {length} characters."}},"reCaptcha":{"version":"1","site_key":"","threshold":"0.5"},"hCaptcha":{"version":"3","site_key":"","threshold":"0.5"}}},"popper":{"ajax_url":"https://www.francescopepe.com/wp-admin/admin-ajax.php","nonce":"b9d7616662","mediaUrl":""}},"state":{"formello":{"captcha":{"enabled":false,"type":"reCaptcha","version":"1"},"errors":[],"debug":false}}}
</script>
<script src="https://cdnjs.cloudflare.com/ajax/libs/prism/9000.0.1/prism.min.js?ver=1.0.0" id="prism-js"></script>
<script src="https://cdnjs.cloudflare.com/ajax/libs/prism/9000.0.1/components/prism-markup.min.js?ver=1.0.0" id="prism-lang-js"></script>
<script id="trp-dynamic-translator-js-extra">
var trp_data = {"trp_custom_ajax_url":"https://www.francescopepe.com/wp-content/plugins/translatepress-multilingual/includes/trp-ajax.php","trp_wp_ajax_url":"https://www.francescopepe.com/wp-admin/admin-ajax.php","trp_language_to_query":"en_US","trp_original_language":"it_IT","trp_current_language":"en_US","trp_skip_selectors":["[data-no-translation]","[data-no-dynamic-translation]","[data-trp-translate-id-innertext]","script","style","head","trp-span","translate-press","[data-trp-translate-id]","[data-trpgettextoriginal]","[data-trp-post-slug]"],"trp_base_selectors":["data-trp-translate-id","data-trpgettextoriginal","data-trp-post-slug"],"trp_attributes_selectors":{"text":{"accessor":"outertext","attribute":false},"block":{"accessor":"innertext","attribute":false},"image_src":{"selector":"img[src]","accessor":"src","attribute":true},"submit":{"selector":"input[type='submit'],input[type='button'], input[type='reset']","accessor":"value","attribute":true},"placeholder":{"selector":"input[placeholder],textarea[placeholder]","accessor":"placeholder","attribute":true},"title":{"selector":"[title]","accessor":"title","attribute":true},"a_href":{"selector":"a[href]","accessor":"href","attribute":true},"button":{"accessor":"outertext","attribute":false},"option":{"accessor":"innertext","attribute":false},"aria_label":{"selector":"[aria-label]","accessor":"aria-label","attribute":true},"video_src":{"selector":"video[src]","accessor":"src","attribute":true},"video_poster":{"selector":"video[poster]","accessor":"poster","attribute":true},"video_source_src":{"selector":"video source[src]","accessor":"src","attribute":true},"audio_src":{"selector":"audio[src]","accessor":"src","attribute":true},"audio_source_src":{"selector":"audio source[src]","accessor":"src","attribute":true},"picture_image_src":{"selector":"picture image[src]","accessor":"src","attribute":true},"picture_source_srcset":{"selector":"picture source[srcset]","accessor":"srcset","attribute":true},"image_alt":{"selector":"img[alt]","accessor":"alt","attribute":true},"meta_desc":{"selector":"meta[name=\"description\"],meta[property=\"og:title\"],meta[property=\"og:description\"],meta[property=\"og:site_name\"],meta[property=\"og:image:alt\"],meta[name=\"twitter:title\"],meta[name=\"twitter:description\"],meta[name=\"twitter:image:alt\"],meta[name=\"DC.Title\"],meta[name=\"DC.Description\"],meta[property=\"article:section\"],meta[property=\"article:tag\"]","accessor":"content","attribute":true},"page_title":{"selector":"title","accessor":"innertext","attribute":false},"meta_desc_img":{"selector":"meta[property=\"og:image\"],meta[property=\"og:image:secure_url\"],meta[name=\"twitter:image\"]","accessor":"content","attribute":true}},"trp_attributes_accessors":["outertext","innertext","src","value","placeholder","title","href","aria-label","poster","srcset","alt","content"],"gettranslationsnonceregular":"4b817bd92c","showdynamiccontentbeforetranslation":"","skip_strings_from_dynamic_translation":[],"skip_strings_from_dynamic_translation_for_substrings":{"href":["amazon-adsystem","googleads","g.doubleclick"]},"duplicate_detections_allowed":"100","trp_translate_numerals_opt":"no","trp_no_auto_translation_selectors":["[data-no-auto-translation]",".wp-block-code"]};
//# sourceURL=trp-dynamic-translator-js-extra
</script>
<script src="https://www.francescopepe.com/wp-content/plugins/translatepress-multilingual/assets/js/trp-translate-dom-changes.js?ver=3.0.8" id="trp-dynamic-translator-js"></script>
<script id="wp-block-template-skip-link-js-after">
( function() {
var skipLinkTarget = document.querySelector( 'main' ),
sibling,
skipLinkTargetID,
skipLink;
// Early exit if a skip-link target can't be located.
if ( ! skipLinkTarget ) {
return;
}
/*
* Get the site wrapper.
* The skip-link will be injected in the beginning of it.
*/
sibling = document.querySelector( '.wp-site-blocks' );
// Early exit if the root element was not found.
if ( ! sibling ) {
return;
}
// Get the skip-link target's ID, and generate one if it doesn't exist.
skipLinkTargetID = skipLinkTarget.id;
if ( ! skipLinkTargetID ) {
skipLinkTargetID = 'wp--skip-link--target';
skipLinkTarget.id = skipLinkTargetID;
}
// Create the skip link.
skipLink = document.createElement( 'a' );
skipLink.classList.add( 'skip-link', 'screen-reader-text' );
skipLink.id = 'wp-skip-link';
skipLink.href = '#' + skipLinkTargetID;
skipLink.innerText = 'Skip to content';
// Inject the skip link.
sibling.parentElement.insertBefore( skipLink, sibling );
}() );
//# sourceURL=wp-block-template-skip-link-js-after
</script>
<script src="https://cdnjs.cloudflare.com/ajax/libs/prism/9000.0.1/plugins/line-numbers/prism-line-numbers.min.js?ver=1.0.0" id="prism-line-numbers-js"></script>
<script src="https://www.francescopepe.com/wp-content/plugins/ollie-pro-1.0/inc/extensions/build/animation-frontend.js?ver=2.2.4" id="ollie-extensions-animation-js"></script>
<script src="https://www.francescopepe.com/wp-content/plugins/google-site-kit/dist/assets/js/googlesitekit-consent-mode-bc2e26cfa69fcd4a8261.js" id="googlesitekit-consent-mode-js"></script>
<script id="wp-consent-api-js-extra">
var consent_api = {"consent_type":"optin","waitfor_consent_hook":"","cookie_expiration":"30","cookie_prefix":"wp_consent","services":[]};
//# sourceURL=wp-consent-api-js-extra
</script>
<script src="https://www.francescopepe.com/wp-content/plugins/wp-consent-api/assets/js/wp-consent-api.min.js?ver=2.0.0" id="wp-consent-api-js"></script>
<script id="cmplz-cookiebanner-js-extra">
var complianz = {"prefix":"cmplz_","user_banner_id":"1","set_cookies":[],"block_ajax_content":"","banner_version":"21","version":"7.4.4.2","store_consent":"","do_not_track_enabled":"","consenttype":"optin","region":"eu","geoip":"","dismiss_timeout":"","disable_cookiebanner":"","soft_cookiewall":"","dismiss_on_scroll":"","cookie_expiry":"365","url":"https://www.francescopepe.com/en/wp-json/complianz/v1/","locale":"lang=en&locale=en_US","set_cookies_on_root":"","cookie_domain":"","current_policy_id":"30","cookie_path":"/","categories":{"statistics":"statistics","marketing":"marketing"},"tcf_active":"","placeholdertext":"Click to accept {category} cookies and enable this content","css_file":"https://www.francescopepe.com/wp-content/uploads/complianz/css/banner-{banner_id}-{type}.css?v=21","page_links":{"eu":{"cookie-statement":{"title":"Cookie Policy ","url":"https://www.francescopepe.com/en/cookie-policy-eu/"},"privacy-statement":{"title":"Privacy Policy","url":"https://www.francescopepe.com/en/privacy-policy/"}}},"tm_categories":"","forceEnableStats":"","preview":"","clean_cookies":"","aria_label":"Click to accept {category} cookies and enable this content"};
//# sourceURL=cmplz-cookiebanner-js-extra
</script>
<script defer src="https://www.francescopepe.com/wp-content/plugins/complianz-gdpr/cookiebanner/js/complianz.min.js?ver=1770304210" id="cmplz-cookiebanner-js"></script>
<script id="wp-emoji-settings" type="application/json">
{"baseUrl":"https://s.w.org/images/core/emoji/17.0.2/72x72/","ext":".png","svgUrl":"https://s.w.org/images/core/emoji/17.0.2/svg/","svgExt":".svg","source":{"concatemoji":"https://www.francescopepe.com/wp-includes/js/wp-emoji-release.min.js?ver=6.9.4"}}
</script>
<script type="module">
/*! This file is auto-generated */
const a=JSON.parse(document.getElementById("wp-emoji-settings").textContent),o=(window._wpemojiSettings=a,"wpEmojiSettingsSupports"),s=["flag","emoji"];function i(e){try{var t={supportTests:e,timestamp:(new Date).valueOf()};sessionStorage.setItem(o,JSON.stringify(t))}catch(e){}}function c(e,t,n){e.clearRect(0,0,e.canvas.width,e.canvas.height),e.fillText(t,0,0);t=new Uint32Array(e.getImageData(0,0,e.canvas.width,e.canvas.height).data);e.clearRect(0,0,e.canvas.width,e.canvas.height),e.fillText(n,0,0);const a=new Uint32Array(e.getImageData(0,0,e.canvas.width,e.canvas.height).data);return t.every((e,t)=>e===a[t])}function p(e,t){e.clearRect(0,0,e.canvas.width,e.canvas.height),e.fillText(t,0,0);var n=e.getImageData(16,16,1,1);for(let e=0;e<n.data.length;e++)if(0!==n.data[e])return!1;return!0}function u(e,t,n,a){switch(t){case"flag":return n(e,"\ud83c\udff3\ufe0f\u200d\u26a7\ufe0f","\ud83c\udff3\ufe0f\u200b\u26a7\ufe0f")?!1:!n(e,"\ud83c\udde8\ud83c\uddf6","\ud83c\udde8\u200b\ud83c\uddf6")&&!n(e,"\ud83c\udff4\udb40\udc67\udb40\udc62\udb40\udc65\udb40\udc6e\udb40\udc67\udb40\udc7f","\ud83c\udff4\u200b\udb40\udc67\u200b\udb40\udc62\u200b\udb40\udc65\u200b\udb40\udc6e\u200b\udb40\udc67\u200b\udb40\udc7f");case"emoji":return!a(e,"\ud83e\u1fac8")}return!1}function f(e,t,n,a){let r;const o=(r="undefined"!=typeof WorkerGlobalScope&&self instanceof WorkerGlobalScope?new OffscreenCanvas(300,150):document.createElement("canvas")).getContext("2d",{willReadFrequently:!0}),s=(o.textBaseline="top",o.font="600 32px Arial",{});return e.forEach(e=>{s[e]=t(o,e,n,a)}),s}function r(e){var t=document.createElement("script");t.src=e,t.defer=!0,document.head.appendChild(t)}a.supports={everything:!0,everythingExceptFlag:!0},new Promise(t=>{let n=function(){try{var e=JSON.parse(sessionStorage.getItem(o));if("object"==typeof e&&"number"==typeof e.timestamp&&(new Date).valueOf()<e.timestamp+604800&&"object"==typeof e.supportTests)return e.supportTests}catch(e){}return null}();if(!n){if("undefined"!=typeof Worker&&"undefined"!=typeof OffscreenCanvas&&"undefined"!=typeof URL&&URL.createObjectURL&&"undefined"!=typeof Blob)try{var e="postMessage("+f.toString()+"("+[JSON.stringify(s),u.toString(),c.toString(),p.toString()].join(",")+"));",a=new Blob([e],{type:"text/javascript"});const r=new Worker(URL.createObjectURL(a),{name:"wpTestEmojiSupports"});return void(r.onmessage=e=>{i(n=e.data),r.terminate(),t(n)})}catch(e){}i(n=f(s,u,c,p))}t(n)}).then(e=>{for(const n in e)a.supports[n]=e[n],a.supports.everything=a.supports.everything&&a.supports[n],"flag"!==n&&(a.supports.everythingExceptFlag=a.supports.everythingExceptFlag&&a.supports[n]);var t;a.supports.everythingExceptFlag=a.supports.everythingExceptFlag&&!a.supports.flag,a.supports.everything||((t=a.source||{}).concatemoji?r(t.concatemoji):t.wpemoji&&t.twemoji&&(r(t.twemoji),r(t.wpemoji)))});
//# sourceURL=https://www.francescopepe.com/wp-includes/js/wp-emoji-loader.min.js
</script>
</body>
</html>